5 Tips to Draw More Customers to Your Market Booth
I’ve been vending markets like crazy this year and I can easily say that it’s helped me double revenue every month for five months since going all in with the Stray Shop in February. Along the way, I’ve learned lots of little tricks to make my booth more appealing to customers in the hopes of getting them to purchase something from my shop, but before I get into my top 5 tips for drawing more customers to your market booth, I would like to give a shoutout to all of the wonderful local vendors who have helped me so much! I could not do this without their guidance and friendship.
Scallywag Letterpress - Sun & Spruce Soaps - Flower Girl Boutique - Swear it’s Art - Bittersweet Luna Chick - Ginger Mystic Jewelry - Sir Reginald Pet Place - FWM Candles - Let’s Aroo
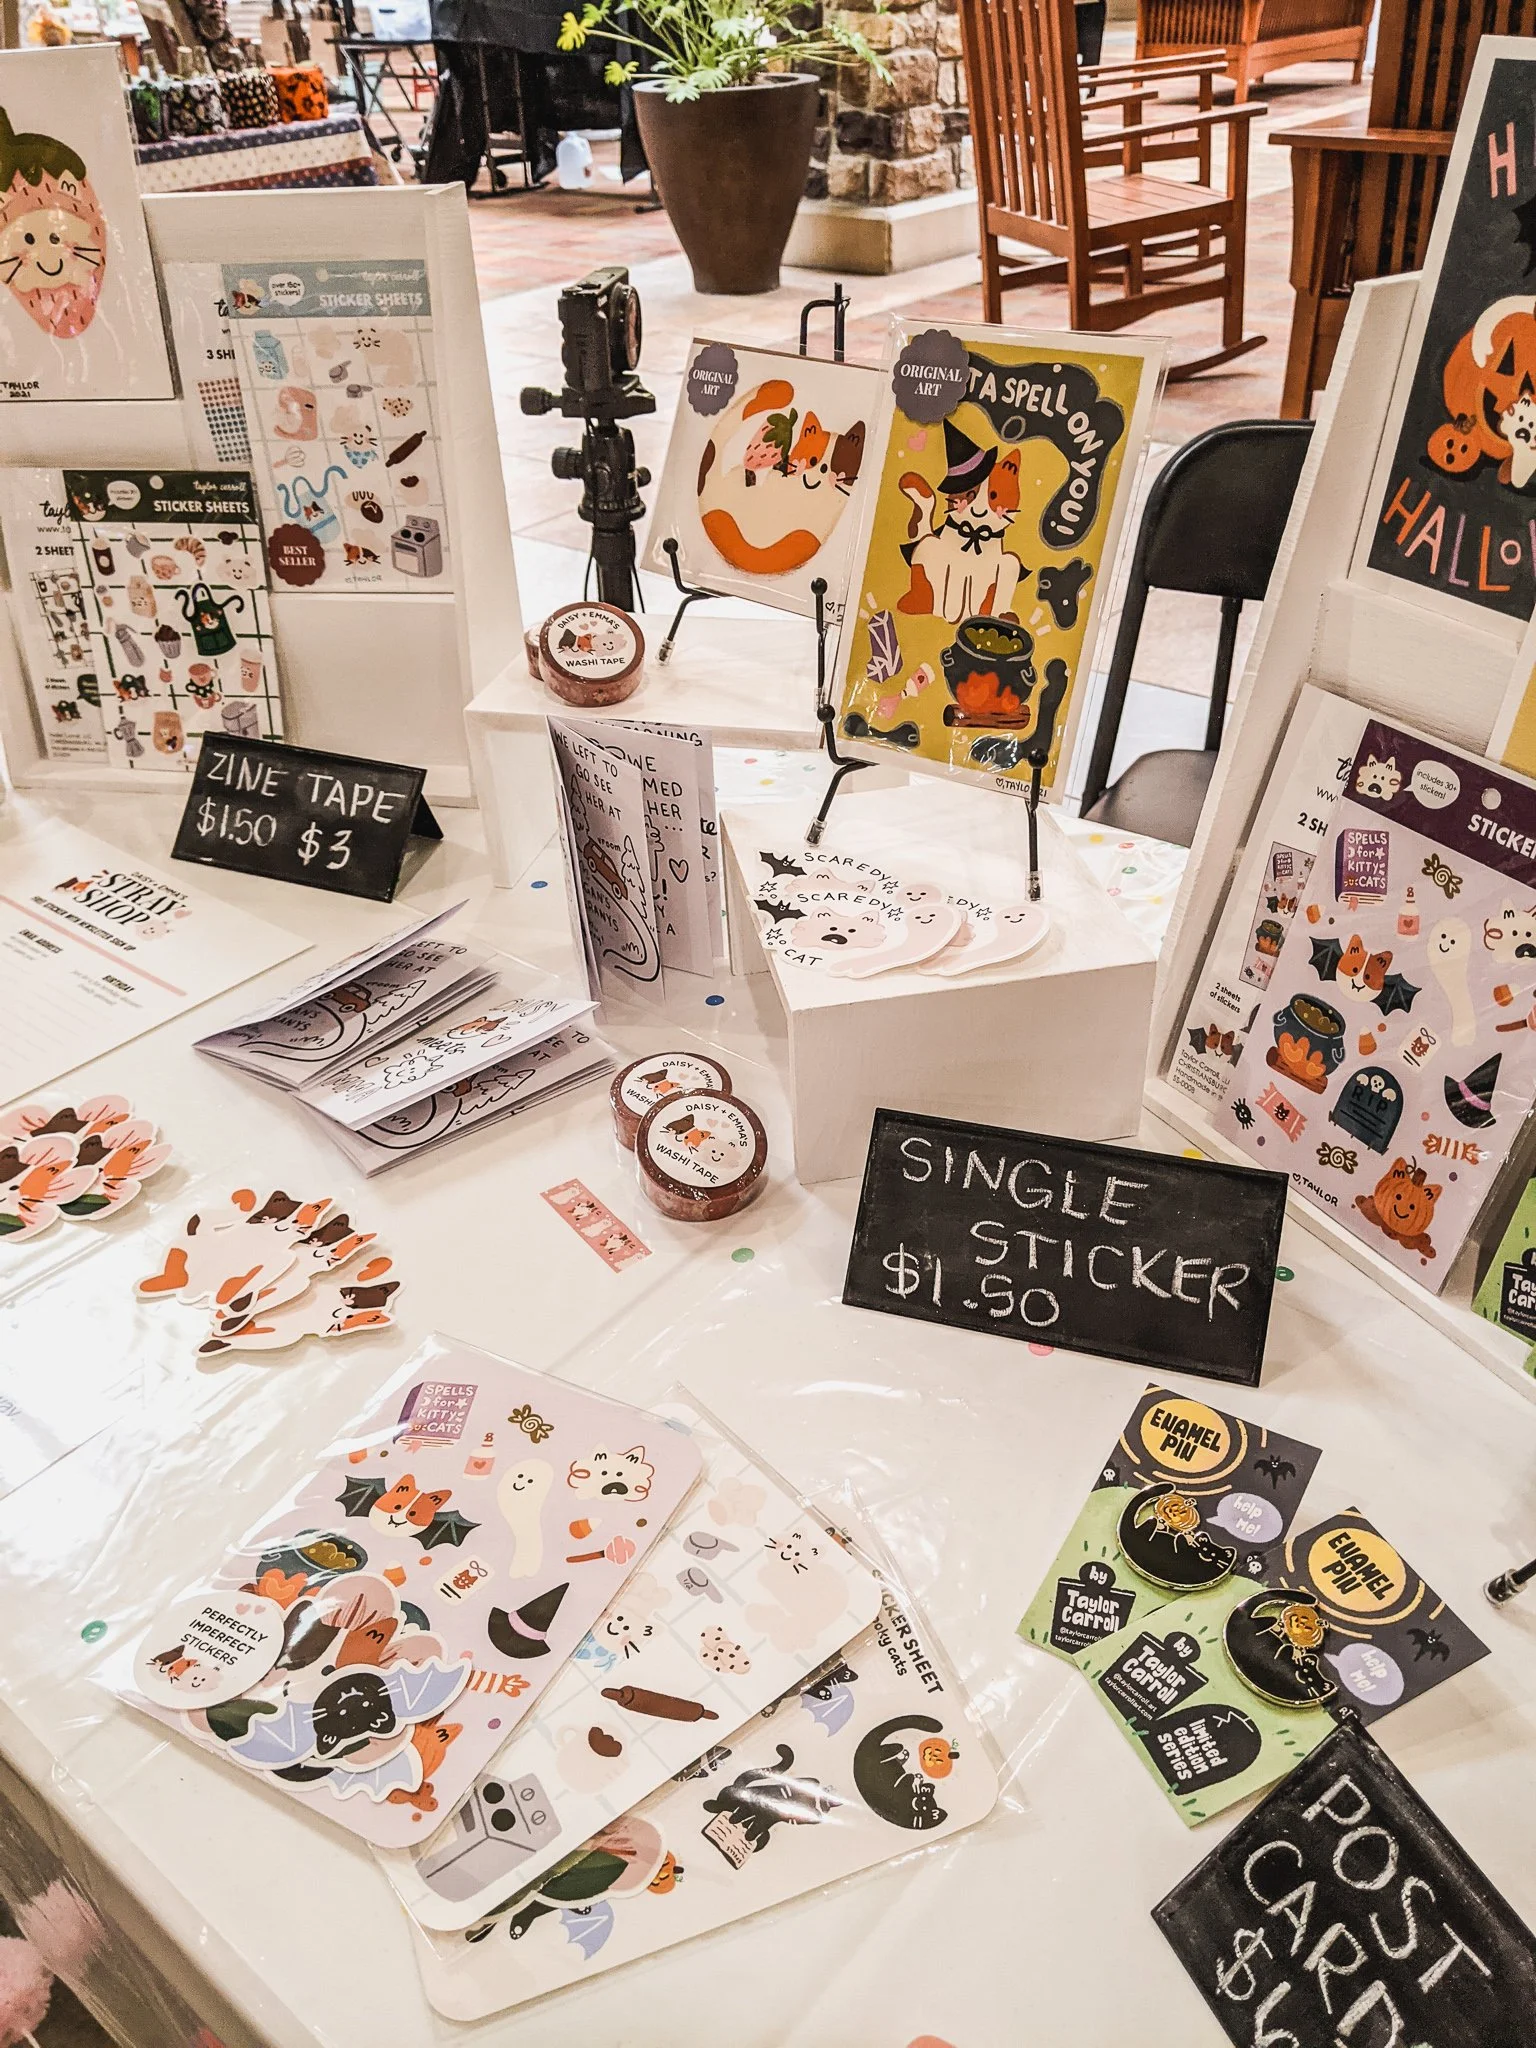
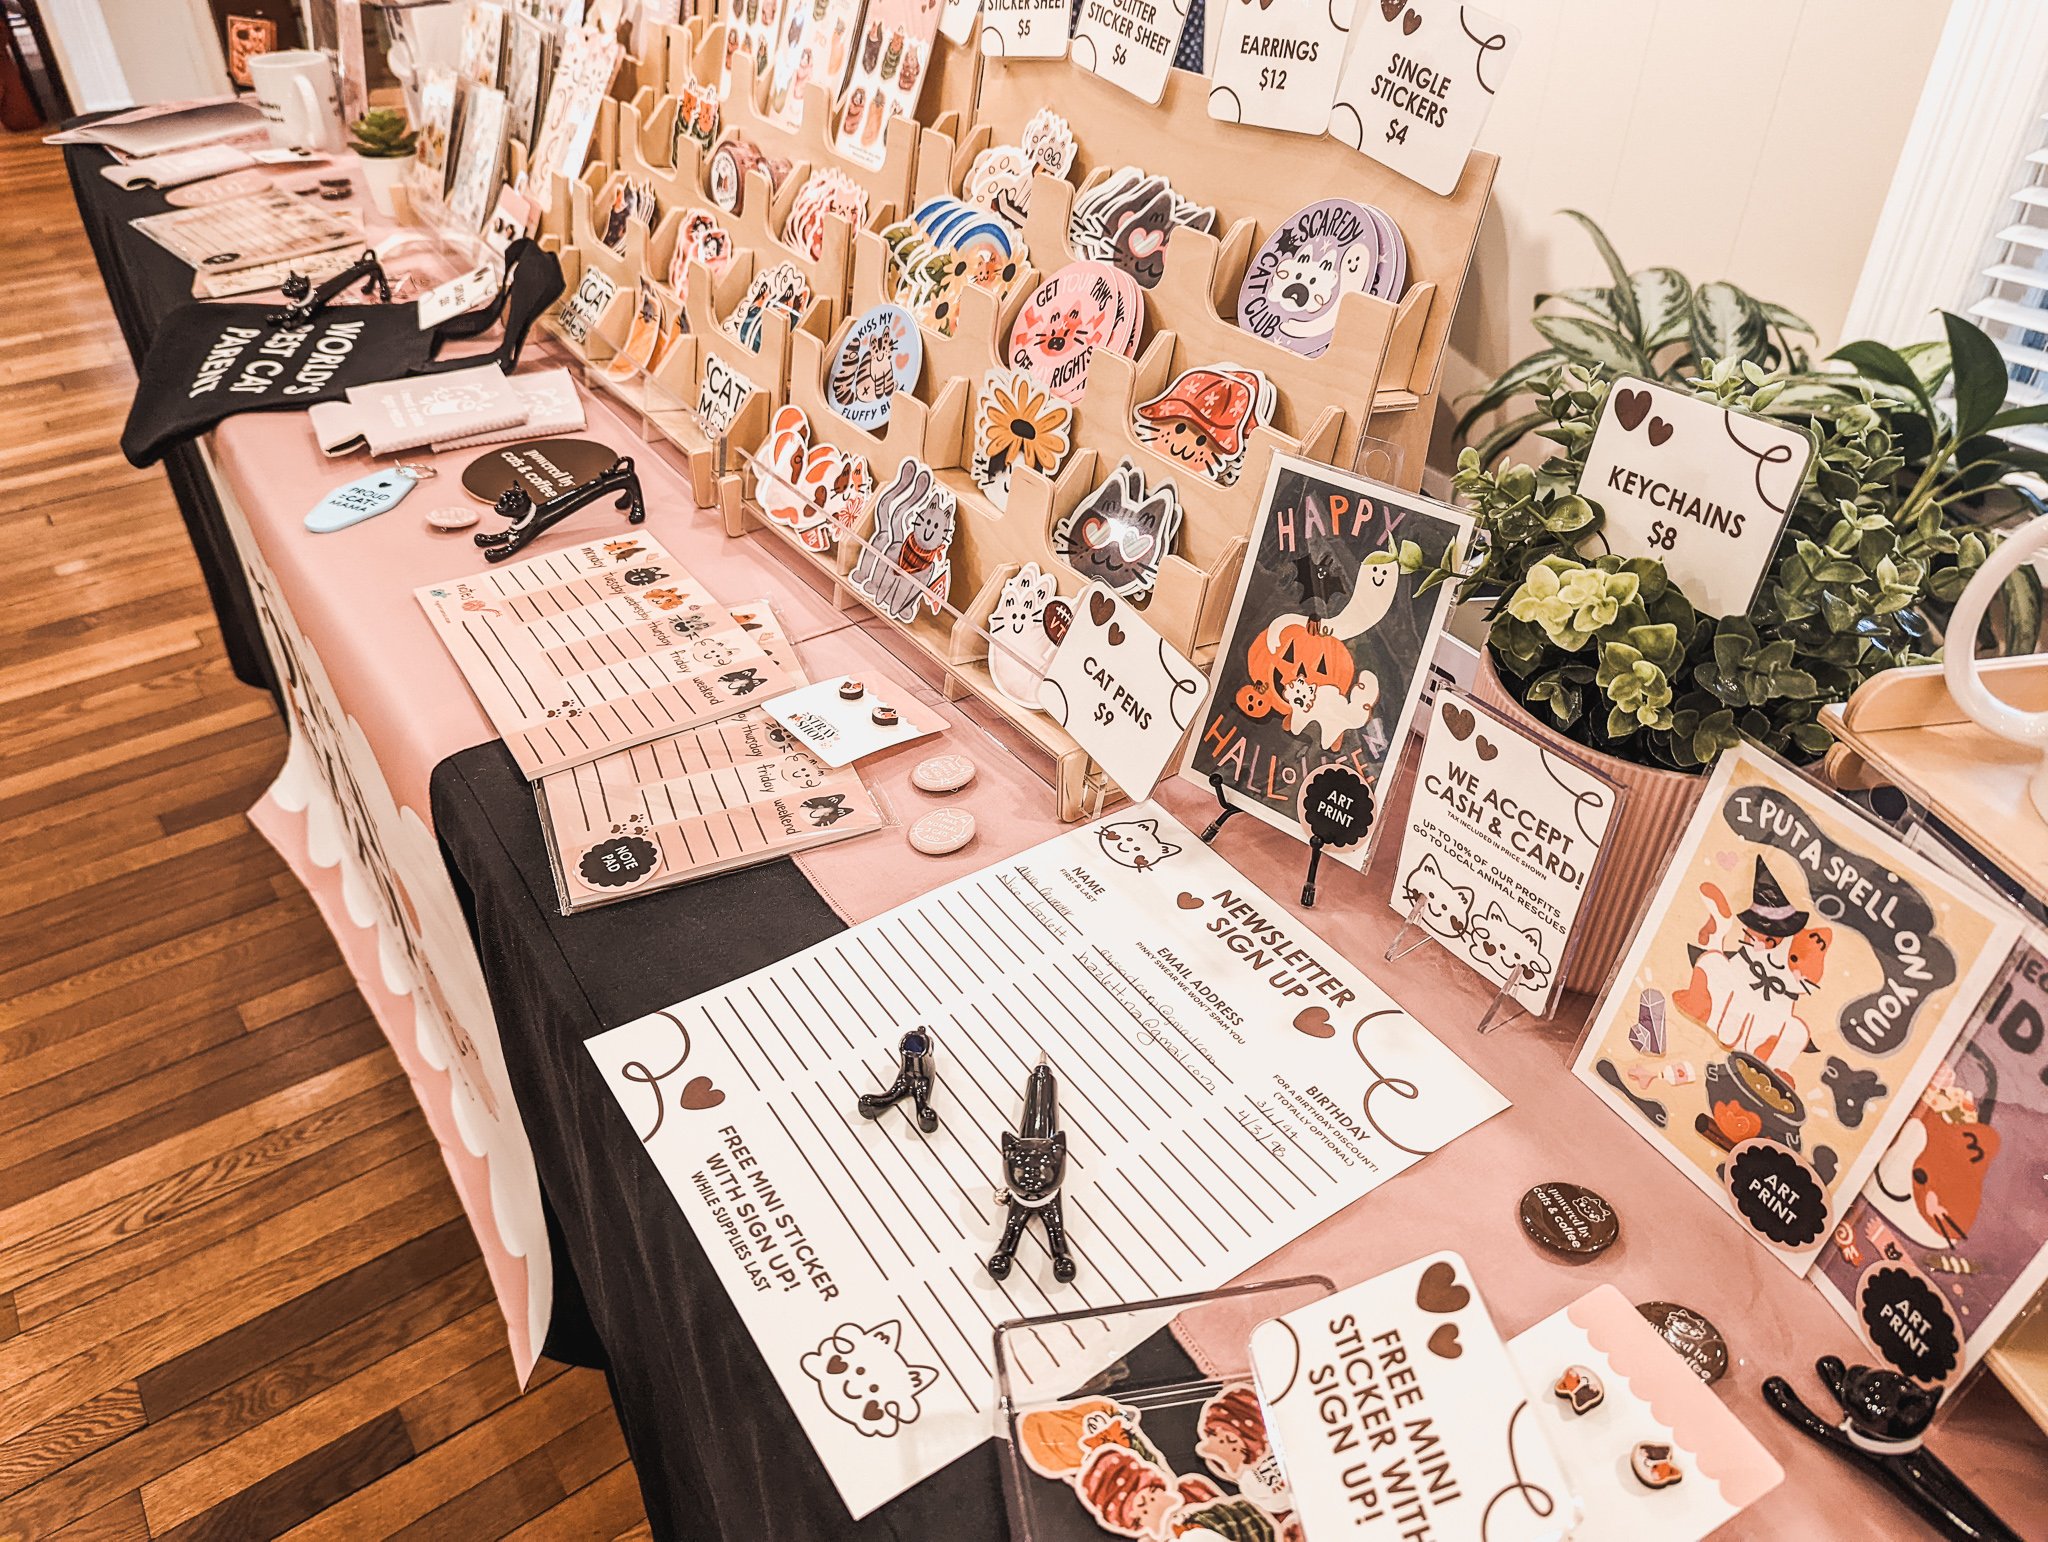
Tip #1: Add Height with Risers
Get yourself some risers or shelves! They are the EASIEST way to get customers to look at your products. It not only helps them see your product better from a distance, but it looks nice and adds visual interest.
When I did my first market, I had some risers that I got for $20 total from the Target dollar spot on my one 4-foot table. It helped so much even though I only had a few products at the time because people could see what I had without getting too close. Customers do not like to get near your table if they don’t see something they like or at minimum, something that peaks their interest.
My first ever table with simple risers!

We’ve upgraded to these risers now.
If everything is flat on your table, they are less likely to walk over to see what you have. Especially if they aren’t at the market with the intention to buy anything. It’s just like displays at stores. They are meant to grab your attention to get you to take a closer look at the products they have for sale.
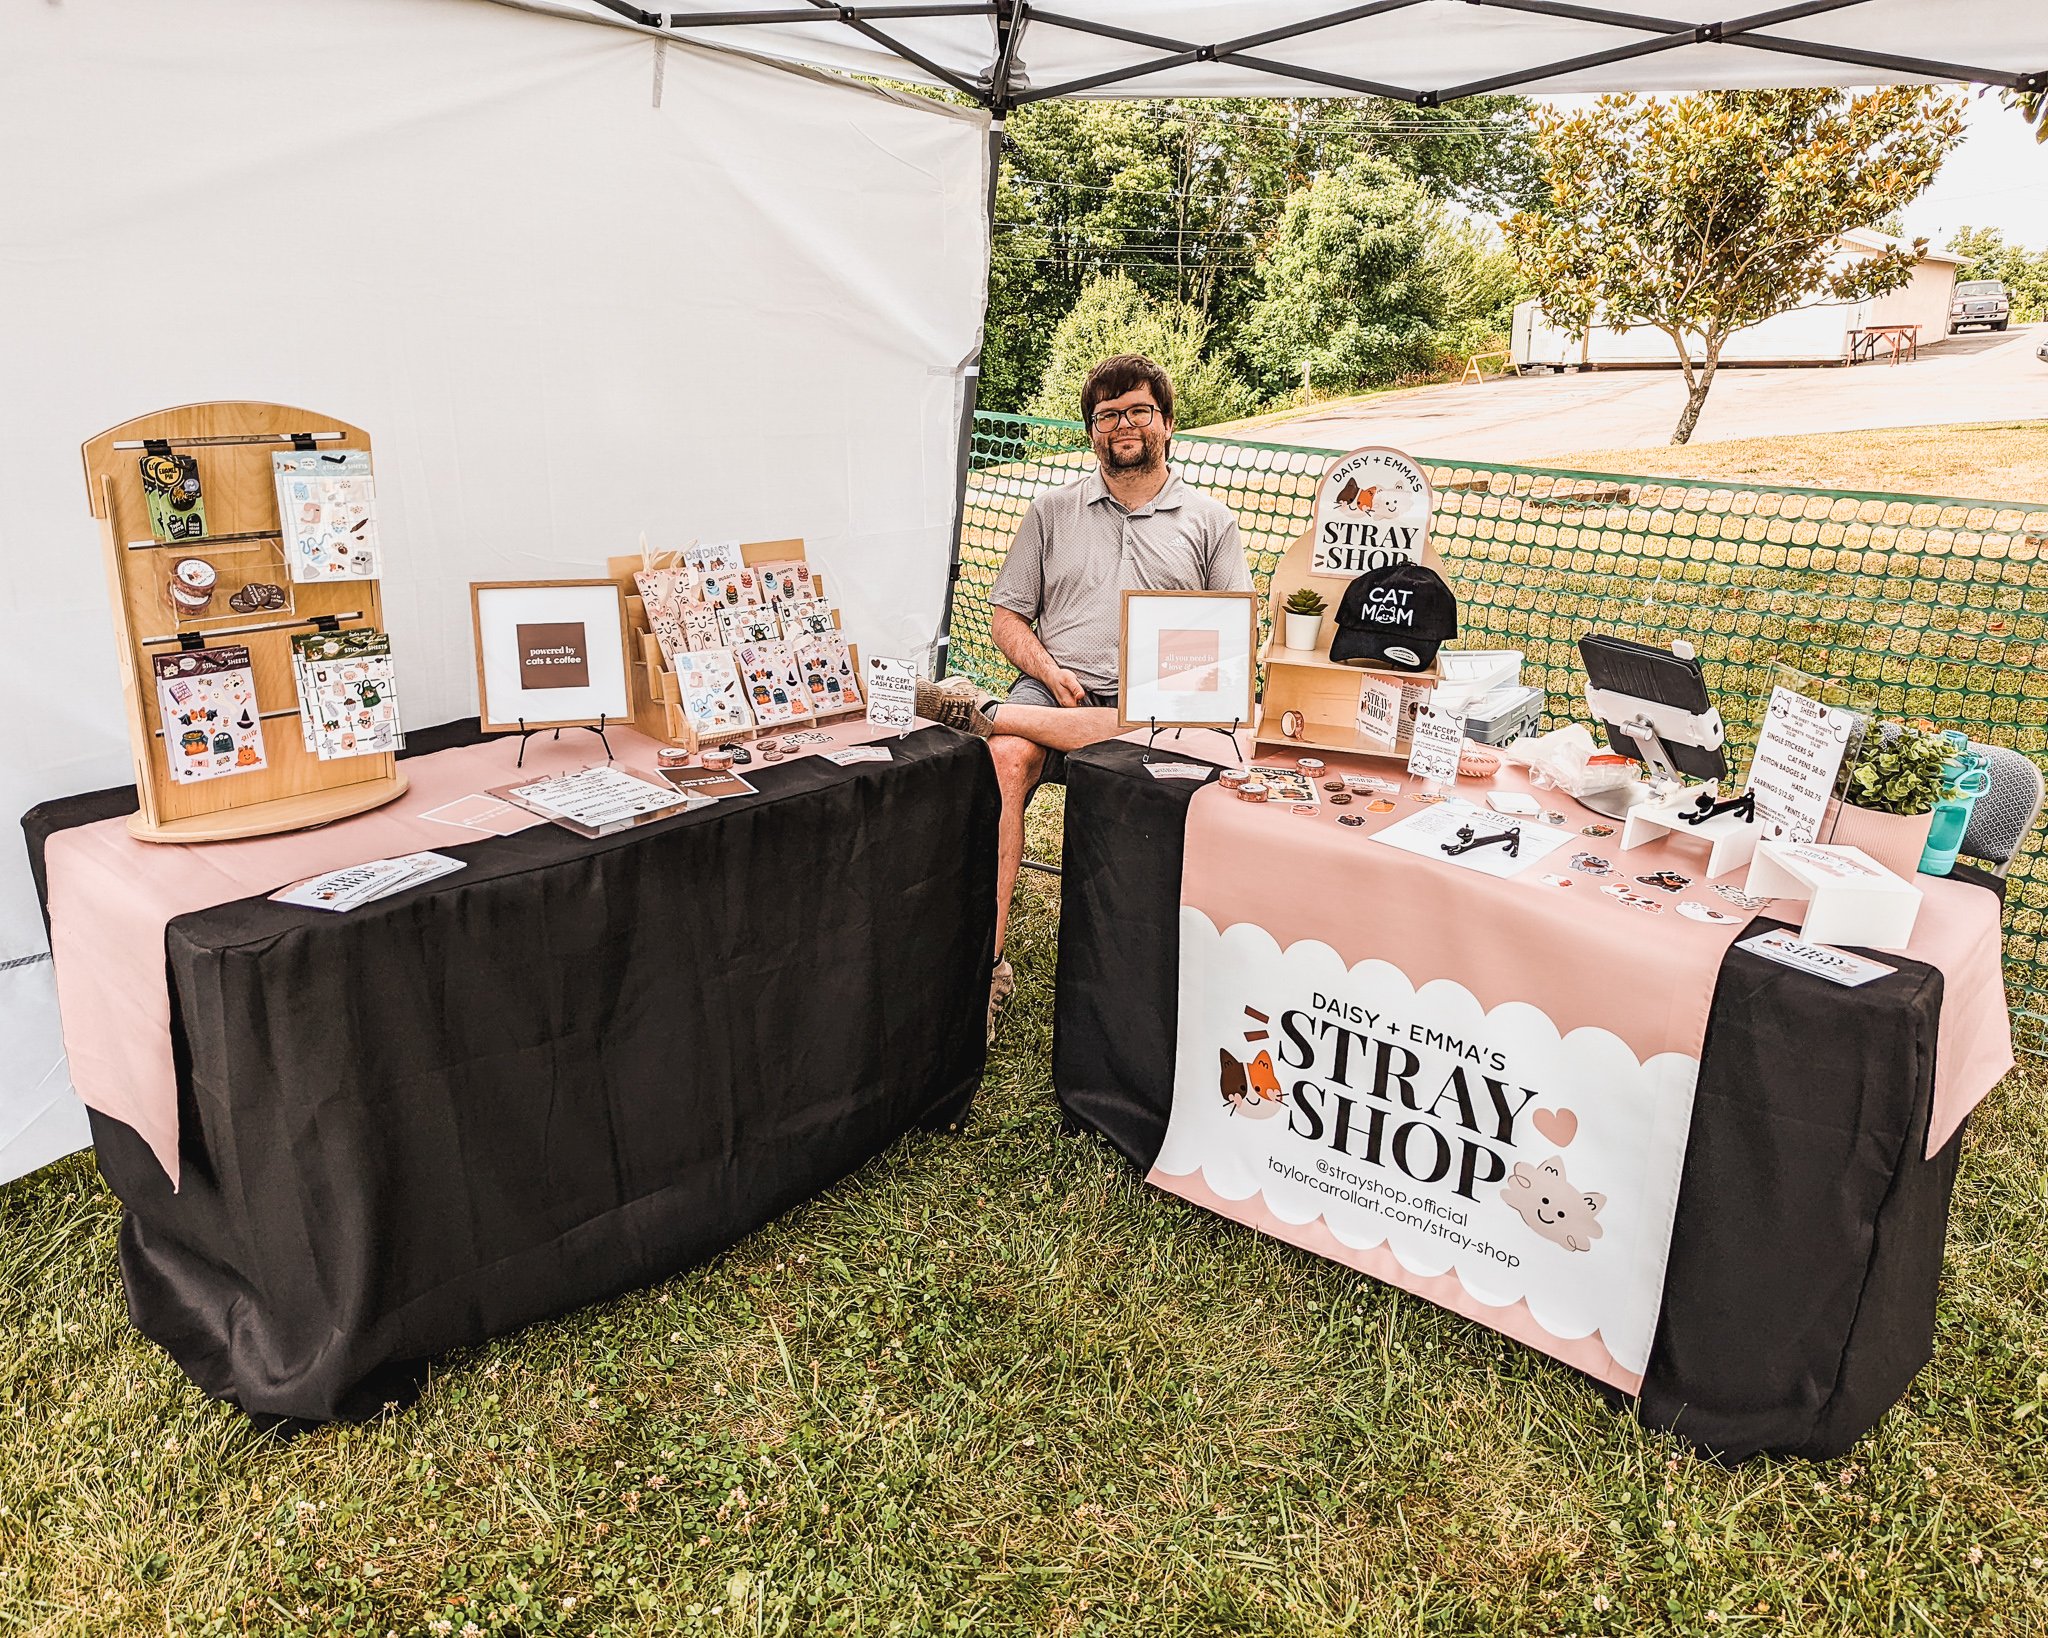
Tip #2: Have Clear Signs with Your Brand
This may seem a little obvious for some, but I can’t tell you how many wonderful booths I’ve seen at markets that have no branding visible other than on their business cards. While they might have super cool products that I’m interested in, if I don’t have time to stop or don’t grab a business card, I’m going to forget they existed. It’s just how most people’s brains work.

This is one of our tent set-ups we have done with both of our banners visible!
This doesn’t have to be a big investment either. I have some banners that I got on sale at Vistaprint that I use. One that goes on the front of the table and one that goes behind me whenever I have somewhere to hang it. Before that, I just had a chalkboard sign that I got from Micheal’s with a picture of our logo taped to it.
You don’t have to have a logo either! Just slap your name with your favorite color on some sort of sign and show that thing off. It helps with brand recognition and gives your potential customers something to associate your stuff with.

Our first ever sign! Only cost about $25 to make.

A closer look at our larger banner that we use as a table runner!
My shop name is also kind of weird to some people, so they will literally look at my sign, look at me, and go “what does the stray shop mean?” This gives me the opportunity to give them my little 15-second pitch on what we are and what we do as a business. Then from there, we can have a conversation about their cats (my favorite part of my job!) or they go “oh, cool!” And leave. Both are wins because they now know my business name and what I do just because I have a little pink sign.
Tip #3: Try Raising Your Table Height
We are back to height again because it can be so important to get your products in your customer’s view. Especially as a small business. I do a lot of markets in malls, so customers like to do that thing they were they try to look everywhere, but your booth to avoid talking to you. They are conditioned to ignore those kiosk vendors that used to be all over malls trying to sell you some toys or a new phone plan. If you ever went shopping in a bigger mall in the early 2000s, you know what I’m talking about.
We have the 4-foot folding tables that can be adjusted to full standing height, so one day I just decided to try raising them all the way, and it was a game changer! Not only did more people stop because it was closer to their eye level, but just that first day, I had over 6 people ask me where my brick-and-mortar store was. It immediately made my booth look more professional to my customers. Added bonus: it was a lot easier to talk to customers while standing. This may just be a personal preference, but I have a lot easier time engaging with people at my booth when I’m standing.
Our first time at this event, we put the tables at a lower height.

This was our second time at that same market, but we raised the height of the tables, and it helped us get a lot more traffic!
Another great bonus is that customers have the bend down less to touch your products. My partner worked in retail, so we always talk about the tricks he learned to sell at his old job. A great one that always comes up is the idea of getting your products into your customers’ hands. Once they are holding it, they are more likely to buy. Having a standing table seems to make it easier for them to pick up my items. If you have fragile items and you want to try this tip, then just be sure to add “NO TOUCHY” signs on breakables!
One last thing to note! I was worried about how this affected the accessibility of my booth. I was concerned it may be too high for wheelchair users to see and interact with my products, but so far, everyone who has come by in a wheelchair has had no issues! If you yourself are a wheelchair user, then this tip may not be as helpful since it could be harder for you to see over your tables, but you know yourself best, so do what works for you!
Tip #4: Arrange Your Tables to Flow with Traffic
Some spaces that I vend make this a little harder, but overall I try to think about where people are going to be naturally walking when placing my tables. For example, when I’m at an outdoor market in my tent, I will push all the tables to the front if the weather is going to be nice. This helps people make a quick decision to stop because those events are normally on a street or in rows, so customers walk through the aisle of the booths. This works well for large indoor events or conventions too. As I mentioned previously, you want to make it easy for your customers to decide to stop. If they have to “walk in” to shop, then it’s another barrier that may stop them from interacting with your products.
We did a L-shape for this market since most of the traffic would be walking past us. It also allowed us to use the side table as a little check out zone, which helped us with crowd management.
For smaller indoor markets, I will walk around to see what the general flow is. If I’m in a corner of a room, I will do an L-shape to fit the room, but make sure I’m far enough out into the space to make it easy for people to stop. I will also position my displays on the table in ways that face multiple directions of traffic to hopefully get some eyes on my products.
We have also been doing what we call the command center set up at mall markets to take advantage of the multiple walking paths. We will have our main table straight facing out towards the main area of the venue, then have two side tables that angle into the front table. This helps us get people to not only make their way to the front table where all of our single stickers are (our best sellers) but also allows us to get more potential customers to stop no matter what side they are walking on.


Tip #5: Make It Easy To Check Your Prices
This tip can be summed up easily by saying… NO ONE WANTS TO ASK HOW MUCH THINGS COST. Don’t get me wrong, some people have no budget and will just grab all the things. We love those customers! However, most people don’t want to ask and even worse they might just not ask and leave your booth. Not everyone is awkward or uncomfortable with asking prices, but most people just assume the price of your product, then they will make a judgment call on whether they want it or not. Don’t give them the opportunity to make a number up in their head! Make it very clear what your prices are, so they have a clear expectation immediately.
Look at all those price signs!


We also add incentives to buy more at markets!
I used to have little chalkboard signs that I picked up a Hobby Lobby for like $3 a piece. Then I moved to sheets that had all the prices on them, but I didn’t like how much table space that took up, so now I make little signs that I can clip everywhere. They are just simple designs that I print out in my studio, cut, laminate, and hot glue a clothespin too. They work great, are super inexpensive, and are easy to replace!
That’s all for now! I hope these tips were helpful. Be sure to check out the vlog for more information & to see the cats! 😺 Also, be sure to sign up for my newsletter for more fun content!